时间表 an Appointment in 海星

How to schedule an appointment in 海星
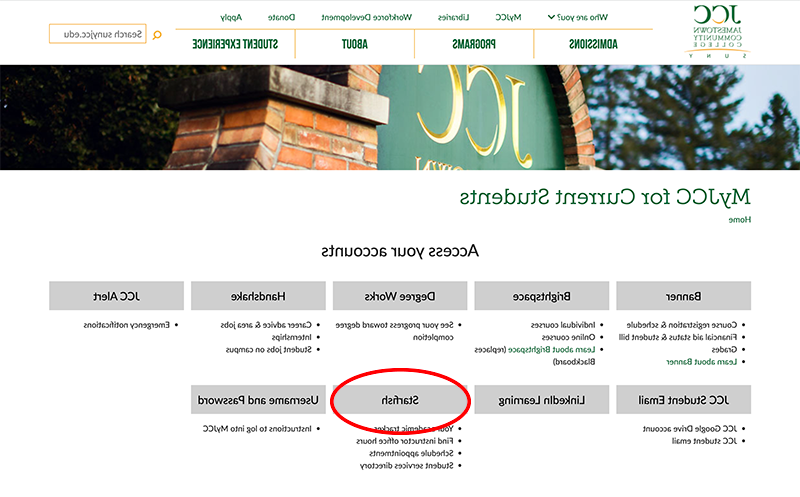
  1. MyJCC 然后登录 海星. Your login will be the same as the one you use for Brightspace.

    screenshot of MyJCC web page with 海星 button circled in red

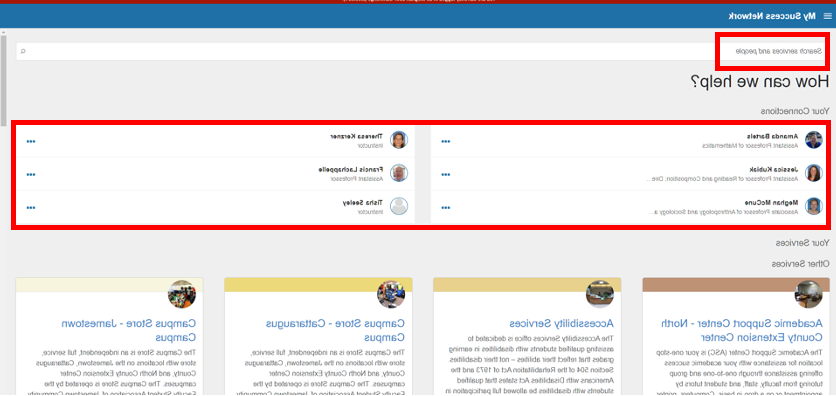
  2. Open the navigation menu and select My Success Network.

    screenshot of 海星 navigation menu with My Success Network circled in red

  3. Find your instructor or advisor in Your Connections. If you don’t see the person you are looking for, search for their name in top search bar.

    screenshot of 海星 My Success Network page with Search Services and People bar and Your Connections names circled in red

  4. Click on the three dots in the same row of the person’s name and select 时间表.

    screenshot of 海星 My Success Network page with three dots expanded menu showing 时间表, 电子邮件, 呼叫, and View Profile circled in red, 时间表 is also gray to show hover select

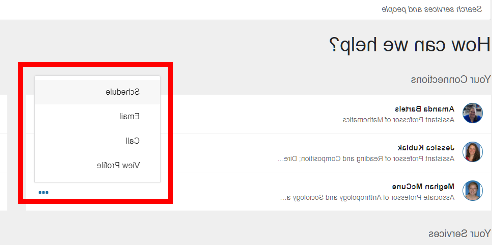
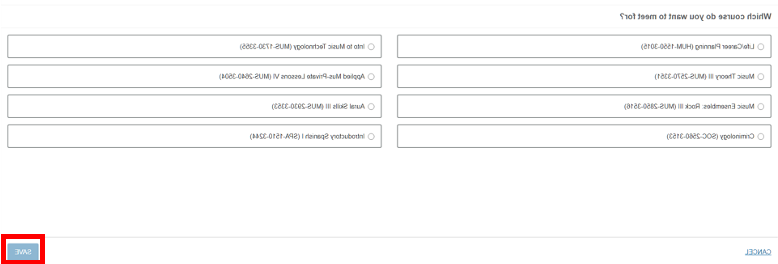
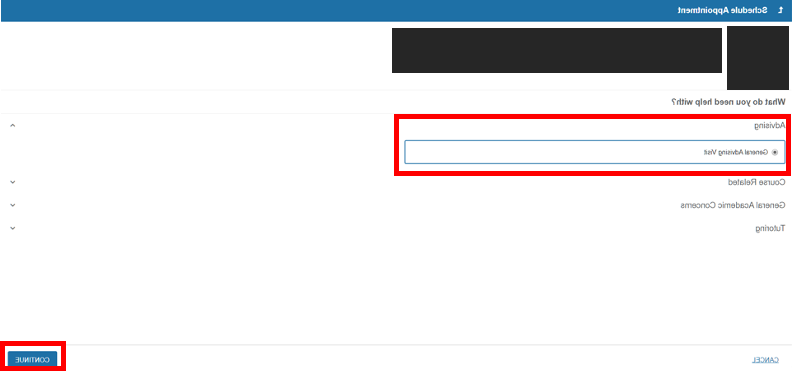
  5. Choose why you’d like to meet with this person about and select 继续.

    screenshot of 海星 时间表 Appointment page with Advising radio button option and 继续 button circled in red

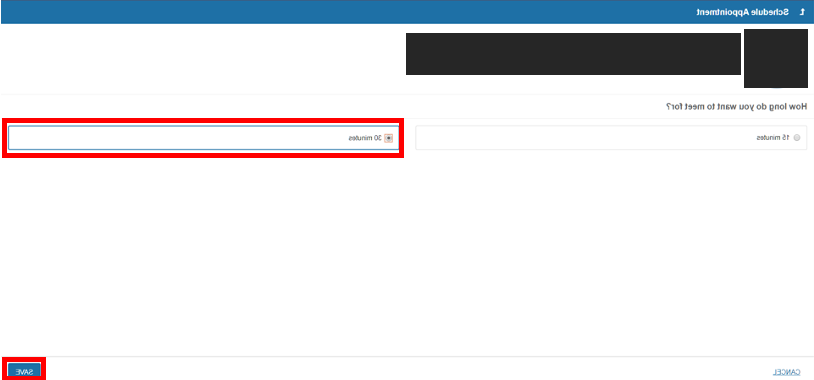
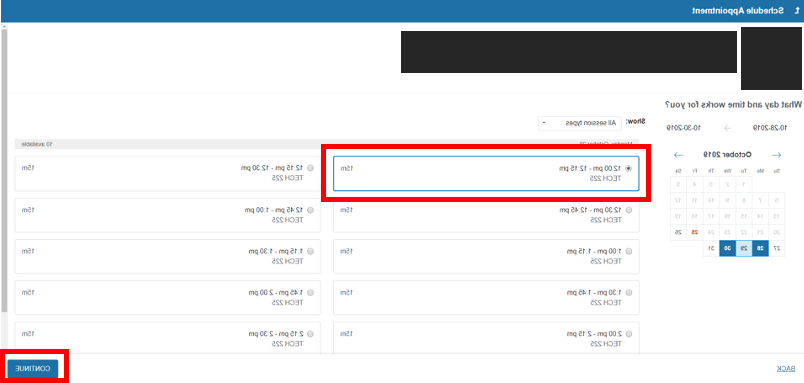
  6. Select an available day and time. You will see all available times for the dates selected on the calendar. You can select different dates. Select 继续.

    screenshot of 海星 时间表 Appointment page with time slot radio button option and 继续 button circled in red, a calendar can also be selected to choose times

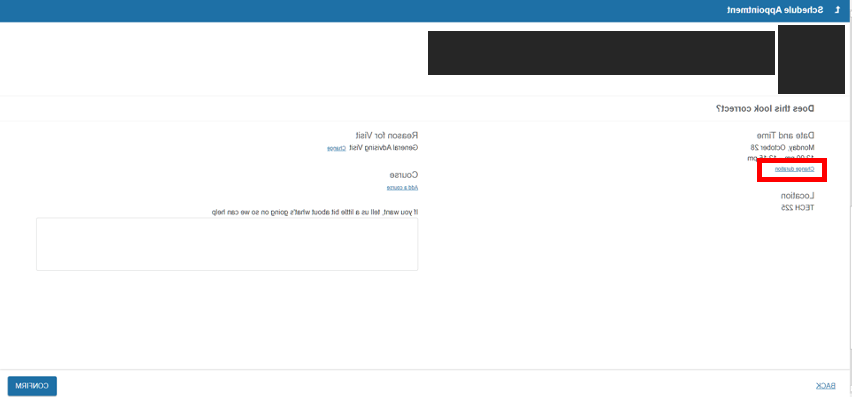
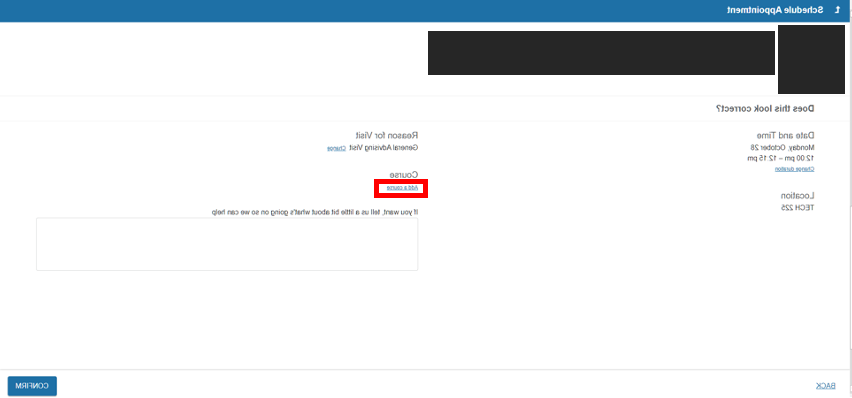
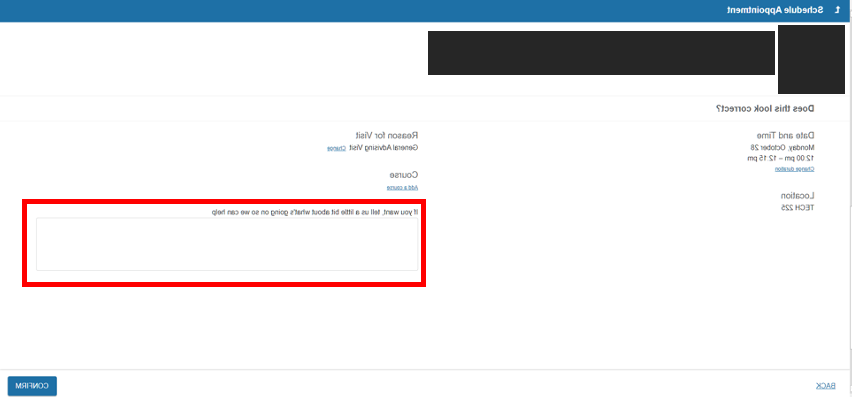
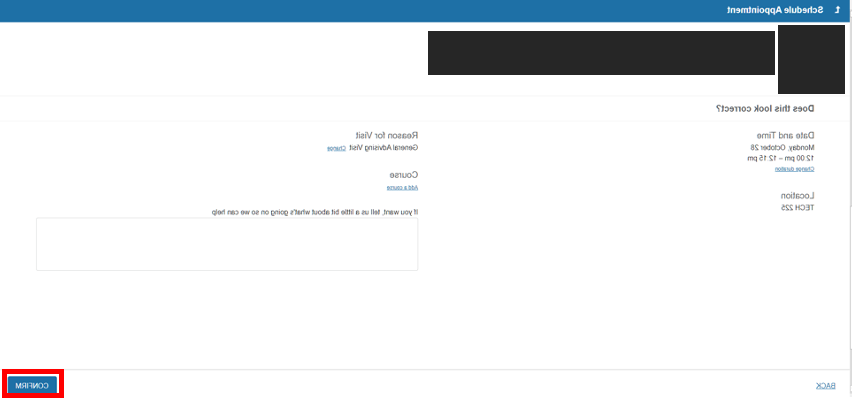
  7. Review all of the information prior to confirming the appointment.
    • Need a longer appointment than the minimum length designated? Select Change duration. Then, select the length of time and select 保存.screenshot of 海星 时间表 Appointment page with Change Duration linked text circled in red, page includes Date and Time, 位置, Reason for Visit, 课程, and 文本区域框, and Confirm buttonscreenshot of 海星 时间表 Appointment sub-page with time radio slot and 保存 button circled in red
    • Want to link your appointment with the course you are taking? Select 添加课程. Then, select your course and select 保存.

      screenshot of 海星 时间表 Appointment page with Add A 课程 linked text circled in red, page includes Date and Time, 位置, Reason for Visit, 课程, 文本区域框, and Confirm buttonscreenshot of 海星 时间表 Appointment sub-page with a list of courses available, and 保存 button circled in red

    • Want to provide a little more information about the meeting you’re scheduling? Add your notes in the text box.

      screenshot of 海星 时间表 Appointment page with Text Area with Tell Us A Little More prompt circled in red, page includes Date and Time, 位置, Reason for Visit, 课程, and 文本区域框, and Confirm button

  8. Confirm the appointment.

    screenshot of 海星 时间表 Appointment page with Confirm button circled in red, page includes Date and Time, 位置, Reason for Visit, 课程, and 文本区域框, and Confirm button

  9. You will get an email reminder at 8 a.m. on the day of the appointment and 15 minutes before it is scheduled to begin.